Manage Transaction Categories
PaperLink personal accounting organizes transactions into Income and Expense categories. The Categories tab in accounting settings lets you browse, add, edit, archive, and delete categories.
Open Category Settings
- Click Settings in the sidebar.
- Open the Accounting tab.
- Click the Categories tab.
The screen has two panels. The left panel shows the category tree with Income and Expense tabs. The right panel shows the detail form when you select a category.
Income and Expense Tabs
Categories are split into two separate lists:
- Income - salary, freelance revenue, investment returns, and other money coming in.
- Expense - rent, groceries, subscriptions, and other money going out.
Click the tab at the top of the category list to switch between Income and Expense.
Default Categories
PaperLink creates a set of default categories when you start using personal accounting. These cover common personal finance scenarios - housing, utilities, transportation, food, healthcare, employment income, investment income, and more.
Default categories are regular categories. You can rename, reparent, archive, or delete any of them.
If you accidentally delete default categories, use Restore Default Expense Categories or Restore Default Income Categories in the Settings tab to bring them back. See Reset Personal Accounting Data for details.
The Uncategorized Category
Each type (Income and Expense) has a system Uncategorized category. It is always at the top of the list and marked with a lock icon.
The Uncategorized category cannot be renamed, archived, or deleted. It serves as the fallback for transactions that do not have a category assigned.
Add a Category
- Click Add Category at the top of the category list.
- Enter a name in the Category Name field (up to 100 characters).
- Optionally select a Parent Category from the dropdown to nest it under an existing category.
- Click Create.
The new category appears in the tree under the currently active tab (Income or Expense).
Category Tree Structure
Categories support up to three levels of nesting:
Level 1: Housing & Rent
  Level 2: Rent
    Level 3: Monthly Rent
When adding or editing a category, the Parent Category dropdown only shows categories that would not exceed the three-level limit.
Edit a Category
- Click a category in the tree.
- Change the Category Name or Parent Category in the detail panel.
- Click Save.
System categories (Uncategorized) open in read-only mode. You cannot edit them.
Archive a Category
Archiving hides a category from selection without deleting it.
- Select the category in the tree.
- Click Archive in the detail panel.
If the category has subcategories, they are archived together.
To view archived categories, enable the Show archived filter. To restore, select an archived category and click Restore.
Delete a Category
- Select the category in the tree.
- Click Delete in the detail panel.
- Confirm in the dialog.
If the category has subcategories, all of them are deleted together. The confirmation dialog shows the total count.
You cannot delete a category that has transactions assigned to it. Reassign or delete those transactions first.
Search and Filter
When you have many categories, use the search bar at the top to filter by name. Use the collapse/expand toggle to show or hide subcategories.
The status filter lets you view Active, Archived, or All categories.
Related
- Manage Company Categories - team-shared categories for company accounting
- Add a Financial Account - create bank, cash, crypto, and other accounts
- Manage Currency Exchange Rates - set up currencies for your financial accounts
- Reset Personal Accounting Data - bulk delete or restore default categories
- Use Description Autocomplete - auto-fill categories from previous transactions
¿Te resultó útil este artículo?
¿Necesitas más ayuda?
Explora nuestro centro de ayuda o contacta a nuestro equipo para asistencia personalizada.
Artículos relacionados
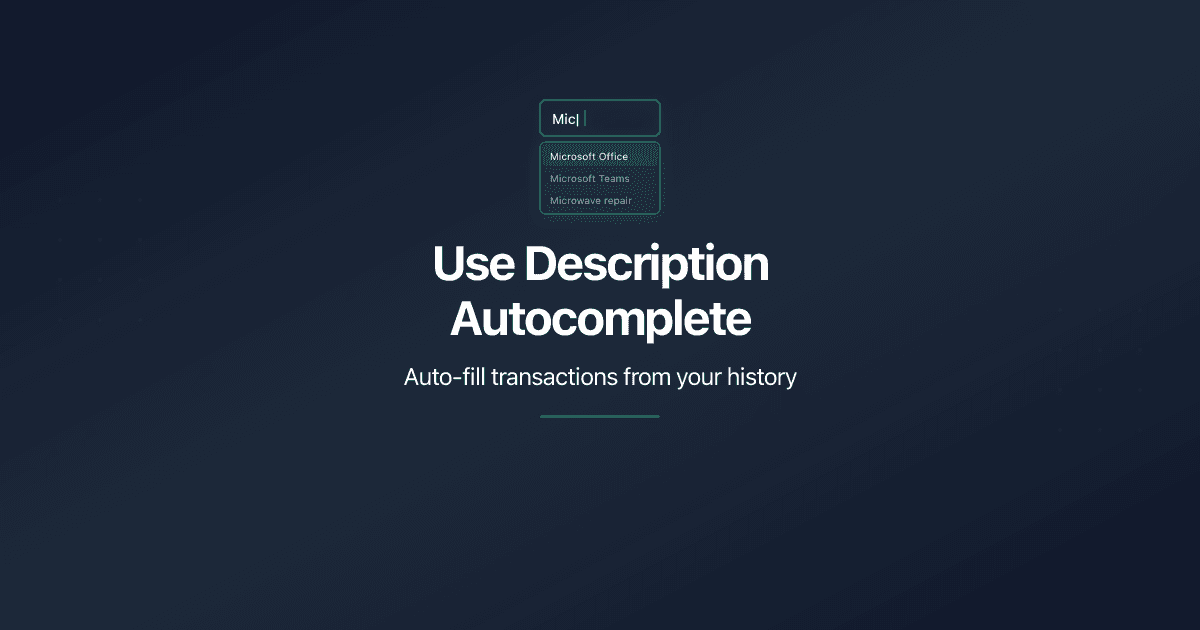
Use Description Autocomplete
Speed up transaction entry with description autocomplete in PaperLink. Type 2 characters to see suggestions from past transactions, then auto-fill account, amount, and category.
Reset Personal Accounting Data
How to delete transactions, categories, and financial accounts in PaperLink personal accounting. What each reset action does and what it removes.
Manage Currency Exchange Rates
How to set up exchange rates in PaperLink personal accounting. Add currencies, set a base currency, use auto or manual rates.
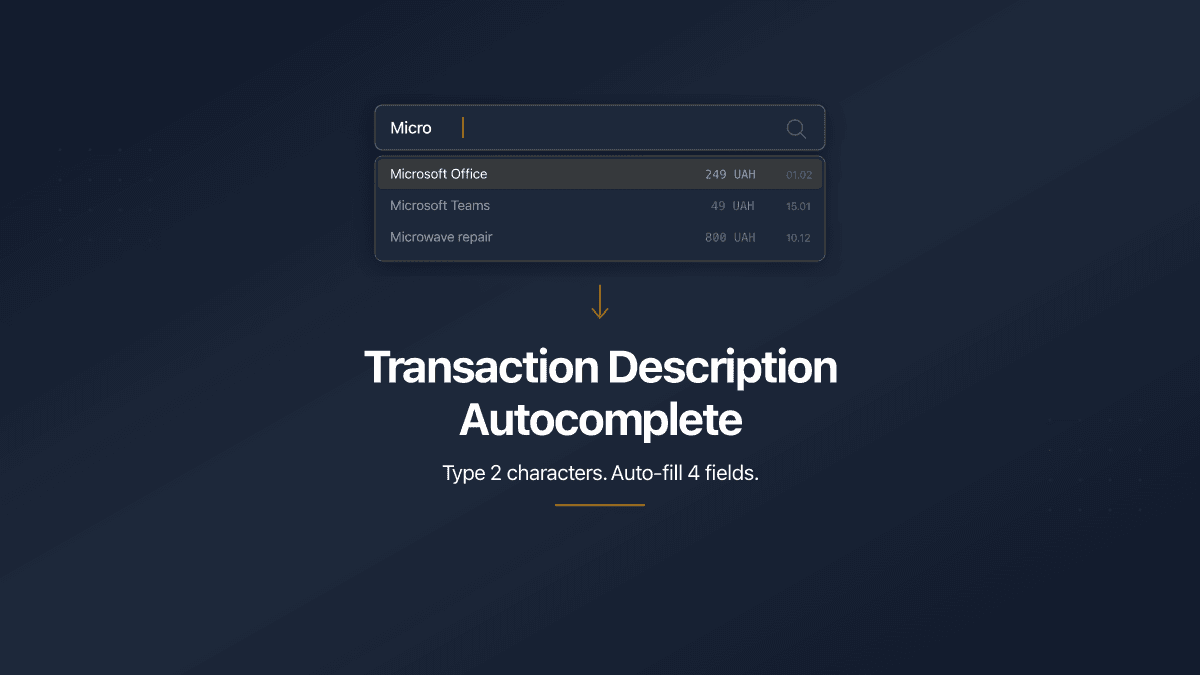
Transaction Description Autocomplete
PaperLink now auto-fills transaction forms from your history. Type 2 characters, pick a suggestion, and the description, account, amount, and category fill in automatically.